¶ The following instructions apply only to older engineering prototypes and similar devices
¶ 1. First Connection
Follow these brief steps:
1. First, create an account on our platform: cloud.zectrix.com
2. After registering, press and hold the device's Down button for more than 2 seconds, then release it.
3. The device will prompt you to enter network setup mode. On your phone, look for a Wi-Fi network whose name begins with Zectirx and connect to it. A setup page will open automatically. Select your home Wi-Fi SSID, enter the password, and confirm. The page will report that configuration was successful.
4. After the device connects to the network, it will indicate that it needs to be added. At this point, remember to press and hold the voice button for more than 3 seconds, or have one conversation first—for example, ask for the time or weather. Then add the device's MAC address on the platform under [Claim Official Device].
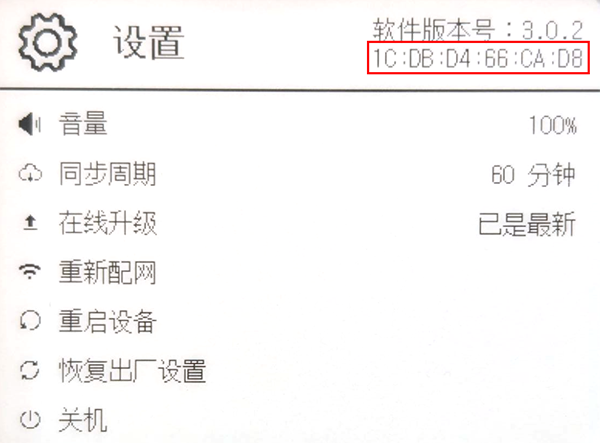
(↑ Press and hold a side button to switch to the Settings page and view the MAC address.)
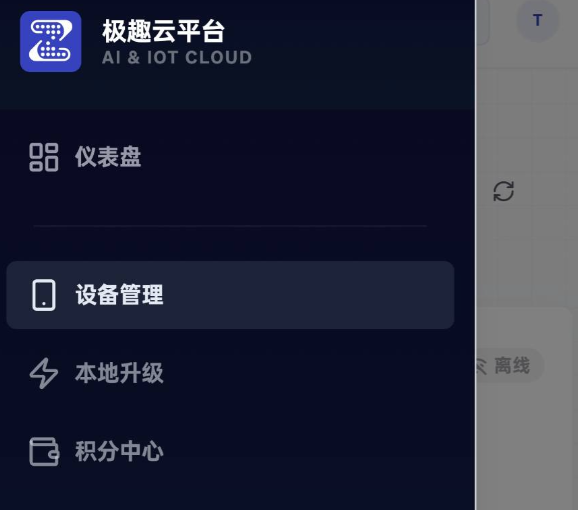
(↑ Select Device Management on the platform.)
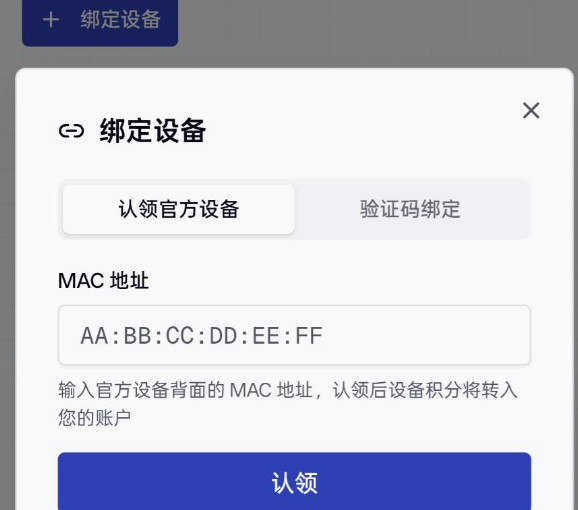
(↑ Select Bind Device, enter the device's MAC address, and then select Claim. If you include colons, make sure they are standard ASCII characters; you can also omit the colons entirely.)
5. Once it has been added, the device is ready to use.
¶ 2. Adding Tasks
¶ Add a Task
Press and hold the button on the front of the device. When the microphone icon appears, begin speaking. Include a time whenever possible, and use phrases that clearly express an intent requiring AI assistance, such as remind me, remember, I need to, or make a note. This improves recognition accuracy. For example:
- Remind me to call XX at 8:00.
- Remember that I need to play basketball tomorrow at 3:00 PM.
- I need to finish my Chinese homework before 7:00 PM every Monday.
¶ Complete a Task
Press a side button once to select a task. Confirming the selected task marks it as complete, stops further reminders, and deletes it automatically the following day.
You can also use voice interaction: “Complete the XX task.”
When a task becomes due, the device sounds an alert. Press the front button to confirm and automatically complete the task. If the alert sounds three times without confirmation, the task is marked overdue and incomplete, and the device stops reminding you.
¶ Delete a Task
All completed and overdue tasks are deleted automatically the following day.
To delete one manually, use the voice command: “Delete the XX task.”
¶ 3. Customizing the Display
Sign in to the platform and open the Dashboard. You will see the following interface:
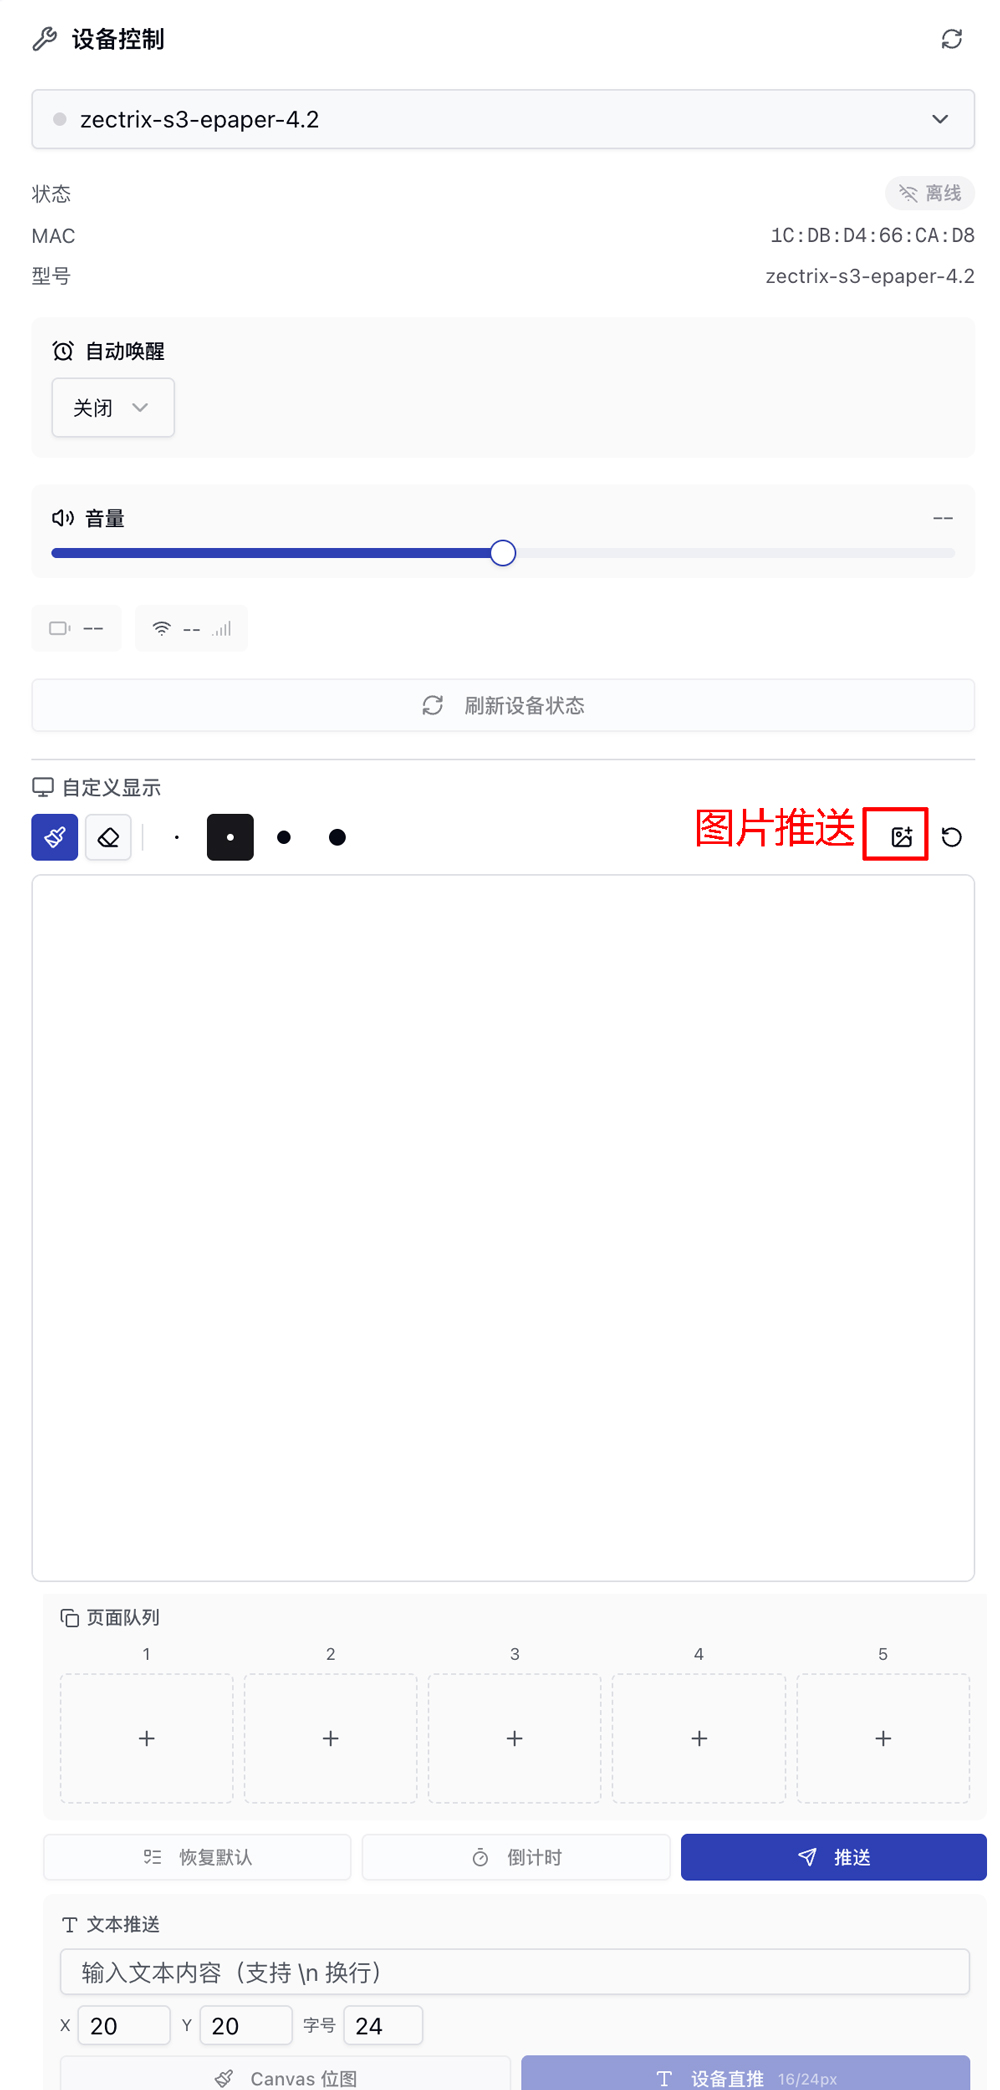
Select Image Push and upload a 400 × 300-pixel black-and-white image with no grayscale. Color images are automatically converted to black and white by the platform.
Select Push. The image will be delivered automatically the next time the device connects to the network—triggered by the voice button—or performs an automatic sync. Press and hold the device's Up or Down button to switch between the task and image pages.
¶ 4. Settings Page
Press and hold either of the two side navigation buttons to open the Settings page.
The device is not continuously connected to Wi-Fi. The sync interval determines how often it synchronizes with the server, including task changes, image delivery, OTA update checks, and other information.
Be aware that a very short sync interval will significantly reduce battery life. Unless you have a specific need, we recommend an interval of 60 minutes or longer.
If the device behaves abnormally, you can restart it.
To switch Wi-Fi networks, select Reconfigure Network. This retains all other settings and changes only the network information.